Friday, May 27, 2016

Review of Free Upcycling Guide by EcoFashionSewing's Mariana Kirova

I ran across Mariana Kirov's ecofashionsewing.com site while surfing on the web for upcycled fashion. 
The tag line on the site is: "We inspire with methods and techniques that turn unused clothing and materials into alluring fashionable pieces!"

Mariana follows up on that promise with the offer of a free guide on upcycling, a generous 55 pages of guide! 

I signed up for the mailing list and immediately received the e-guide as a PDF. I read the guide and am very impressed with the range of what is presented.

Mariana spends a good portion covering the basics of design principles such as color theory, fabric texture, line direction and silhouette, all handy when you are inventing your own new design. 

She follows up with various upcycling techniques coupled with examples from upcycle designers you'll know from Pinterest such as Jam Fashion and Broken Ghost Clothing. 

The booklet ends with "3 Simple Steps to Start Your Own Upcycling Project" and links and resources.  

Wow - what a generous gift!  I recommend reading it if you have any interest in upcycling.

In addition to the free guide Mariana also developed this amazing graphic, follow the link to see the whole thing. 


39-terms-definitions-diy-sewing-and-sustainable-fashion 

What a delight to find such a kindred and generous soul!  

Thank you Mariana!!!
*******************************************************************

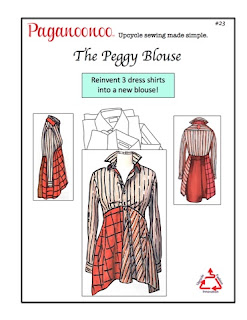
P.S. I've developed beautiful and flattering upcycled fashions with instructions that you can use to duplicate the garments and get a custom fit. The brand name is "Paganoonoo" and the instruction booklets are sold on Etsy.  
The reason I created Paganoonoo is that I want all sewists to have successful upcycling experiences!  Upcycling is great for the planet and kind on our budgets. Check out my upcycling article in Threads magazine issue #177!

Happy Upcycling! 

No Thigh Gap LOL

I had my DNA tested recently to find out my ancestry and some inherited traits.  They did not test any marker related to thigh gap but if they had I know what the answer would have been - 0% chance of thigh gap, LOL.  

Well I recently bought a pair of NMDJ skinny jeans at the thrift store, obviously originally owned by someone with a similar genetic make up as the inner thigh was worn out.  The thing is otherwise they were a perfect fit and length, so..... time to use my mending skills.
Worn out inner thigh on skinny jeans

Solution to worn out inner thigh - use a bit of the yoke from a dress shirt, already in double layers, and almost the right shape.
The trick was to find a dress shirt with a similar color blue.  The best match in my scraps was not a solid, but the print is subtle.
Both sides have been zig zagged in place.  None of the wear showed in a normal standing position so for a spilt second I considered not repairing them and then I remembered how much I bend over gardening.  P.S. I used a zig-zag stitch because I believe it will provide a bit more stability and less stress on the fabric so it doesn't tear again soon.
The fabric was part synthetic and had a bit of a prickly feel so I opted to remove the pieces under the patch.   I pinked the edges and left enough fabric inside the zig-zag to account for future fraying. 


There was some wear just above the back of the heels so I decided to patch that too.  As you can see in the photo I used a bit of the front placket and adjacent fabric.
I know the patch looks a different color here - just the way the photo turned out.  In this case I left the edges raw/pinked again. I  did a bit of quilting over the patch as I though it would sag otherwise.

All set to wear my mending proudly!

Happy Upcycling,  


Michelle

Monday, May 23, 2016

New "Patti" Blouse with Anime character

Latest upcycle tale:

I got REALLY lucky in a thrift store.  I was cruising through the boy's section because it can be hard to find decent XS shirts in the men's and women's section and I ran across an amazing printed shirt featuring a large Anime character.


 I'm sure some of you know exactly who this character is, but I just liked the graphic.  It's the kind of heavy synthetic polyester I normally wouldn't touch but this was irresistible.

What to pair it with?  I found a poly skirt in greenish yellow with light grey netting on top.  Perfect!  And for the third element I knew I needed to play to the colors in the shirt without introducing major competition.  

Of all things a flannel plaid worked perfectly. I ADORE how playful this version is.


You can also make a shirt like this using the upcycle sewing instructions in the Paganoonoo Patti Pattern, available in my Etsy shop.  Intermediate stitchers will delight in the detailed instructions and numerous illustrations.  Create your your own version now!

Happy Upcycling! 
Michelle

Friday, May 20, 2016

Studio Post Cleaning

My studio almost reached a state of perfection before I dived into another project, LOL. Here is a peek at the current state of affairs. 

I consider myself lucky that I have a hardwood floor for easy sweeping of scraps. The grey shirt is my latest project. More about that another time.
#Paganoonoo Studio
 The increased amount of room with the table on the far wall and the slimmer depth dresser on the long wall is delightful!  The dresser was a lucky find at a garage sale.
#Paganoonoo Studio
A peek inside the drawers:
All those little and essential tools, like seam rippers, bodkins, wax, chalk markers, etc.

I confess, I hoard old tracing paper and cannot abide the new stuff. 

Misc paper stuff, including the Thread issue (#177) with my article

Snaps of all sizes, hooks/eyes ditto, belt buckles, whopper poppers, purse findings, and other hardware.
 

Scissors and cutting tools, many of which need sharpening.

 Embroidery hoops, fodder for the DVD player.

Office supplies, hammer, piece of wood to use with leather punches and for the button hole cutter, magnetic wand for picking up pins and needles, etc.

 Adhesives of all sorts, leather punch kit, magnifying glasses, compass set, recycled yarn, etc.

Vintage linens, mostly crocheted

On top of the dresser I store my rulers and "grab-it" thing in a large glass vase. The decoupaged piece is a gift from Jo, a family member we lost last year. Miles Frode 's drawing, painted on the inside of a piece of bark, is temporarily resting in a glass vase.
Paganoonoo Studio, drawing by Miles Frode
 The rest of my storage is in the built-in drawers and shelving.  Now I have all my scraps in bins sorted by color, yeah!  I also have bins for extra collars (got to love double collars!), sleeves, plackets, pockets, and pinked seams from shirts. 

Having containers to hold scraps from my projects is making tidying up and retrieving much easier.

 I use Pampered Chef twirling utensil holders for my pencils & markers. At a garage sale I found a piece of wood with holes drilled out for my Sharpies.

My parents gave me two framed vintage paper silhouette cutouts of a women sewing that belong to my Grandmother.

If you think upcycling prevents large stashes, ha, ha, ha....
Here is mine in the room next door to my studio.  
 Some the things on the rolling racks are finished Paganoonoo garments and there is a whole lot stash going on.  

If you are now inspired and ready to start sewing, try out a Paganoonoo upcycle design, instructions are for sale in the Paganoonoo Etsy Shop.


Happy upcycling!  


Michelle

Saturday, May 7, 2016

Tidying up the Paganoonoo Studio

I've been ready to unleash all of my creative inspiration from the Ashland retreat AND have been faced with the reality of a very messy studio.  Too messy to even want to unpack.  

I've been tidying up this last week, buying storage containers, sorting, recycling, making give-away piles, and finding/rediscovering stuff, LOL.  I feel very blessed indeed to have several rooms for Paganoonoo activities.  I'm focusing on my sewing area.
I swapped my long dresser and long table which gives me less depth in the room, but more floor space. 
My original watercolors
Love my long IKEA table
And the built-in cabinets  
Sorting out and labeling all the bits and pieces
Getting close to done!

Happy Upcycling,

Michelle 

Thursday, May 5, 2016

Design Outside the Lines with Diane Ericson in Ashland

I had the privilege of attending my first Design Outside the Lines (DOL) retreat last week.  What happened was beyond my expectations! Diane Ericson and Holly Badgley co-led our retreat and both of them shared their own spin on art-to-wear and surface design. 

Wow, Just wow.  By day two I was moved to tears by the richness of the conversation and the examples.  I felt exactly like a kid in Willie Wonka's candy landscape.  
Ashland's dogwoods in bloom
First of all escaping from California's drought stricken landscape and seeing all of the Ashland dogwoods in bloom and deep drifts of moss was magical.  I could walk to the retreat space and a lovely walk it was.
Thick moss!
I loved Holly's example vest on Diane's website and asked Holly if I could make the vest.  I tried on a vest muslin so I could see what to adjust.  Then I copied the pattern thinking that was going to be my project. LOL
  

I laid out all my goodies storyboard fashion with a piece of heavy grey Irish linen from Britex.
 The robins egg blue thread/string is a find from SCRAP in San Francisco.  Next to that are some large vintage Mother or Pearl (MOP) buttons I bought while visiting my Aunt Jane in Wisconsin. 
The circles are beaded motifs cut from the bottom of a skirt.
The bird is a panel I purchased from Diane Ericson.
The print is a small bit of Liberty of London fabric I purchased at the store in 2014.
The fuzzy grey yarn to the left of the bird is from our PenWAG (wearable art guild) end of the year stash sale, and the bagged trim a gift to the class from one of the local stores. The fabric scraps on the right are from upcycled shirts, and the grey ribbon from The Ribbonerie in San Francisco. One of the fun things about making wearable art is the stories behind the bits and pieces.

Then Holly and Diane started to share ideas, techniques and samples.  Oh boy!  They set up a workstation with paints, stencils (Diane sells stencils online), stamps, fabric pens and silkscreens.

I started to mark fabric 
from my box of pink and red scraps.


One of the other techniques was making fabric out of scraps by sewing the odd shaped ends together. I was intrigued especially because I have so many cotton scraps from my upcycling. The other reason is that Diane demonstrated how to drape these created pieces of fabric on a dress form to see what looked and felt right.  Pure play! 


I stenciled fabric and I started to assemble the box of pink and red scraps I brought along into 3D fabric. And drape to see what showed up.


I'm thinking kimono top.  I have big plans now for my many boxes of lovely cottons and linens from upcycling dress shirts.
I also used some smaller scraps between pieces of Solvy and made this bit.


More to come in the next post.  Happy upcycling!

Give yourself an upcycling advantage with Paganoonoo pattern instructions!  Upcycle sewing made simple. Etsy Shop.


Michelle