Monday, November 13, 2023

Paganoonoo Denim Challenge, 2023

Join us!!  
Submit your entry on the Facebook Group: Paganoonoo Upcycle Sewing Group by February 29, 2024 (new date!). 

Three entries will be selected at random to receive a free Paganoonoo Tutorial of their choice.

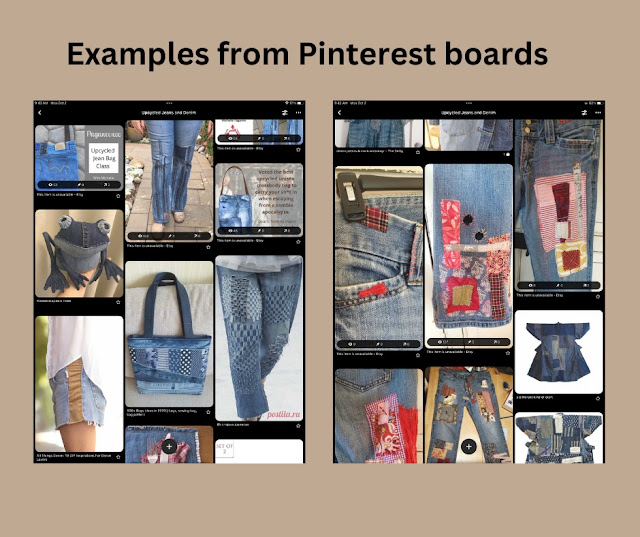
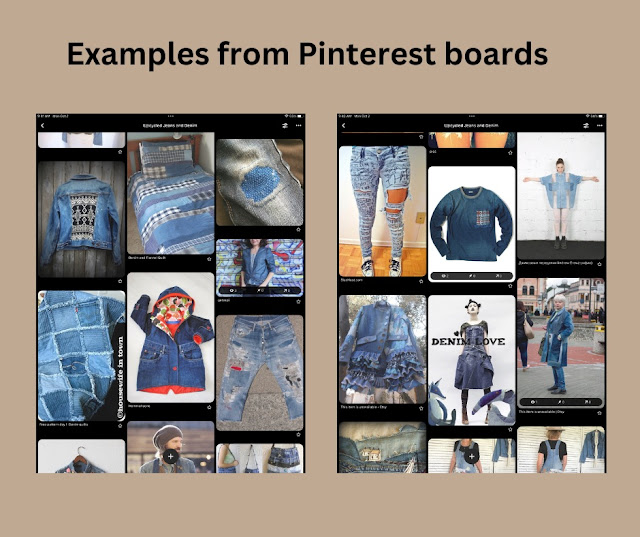
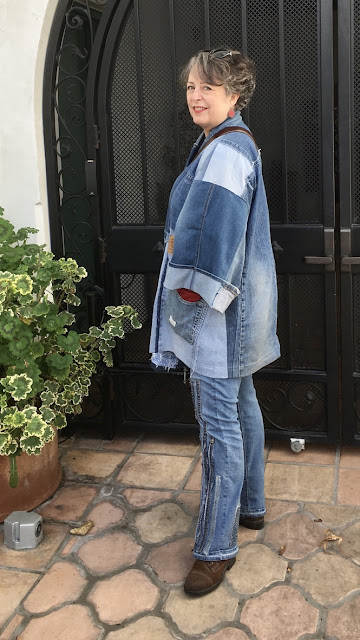
Get inspiration form Michelle's Pinterest board of upcycled denim - 1100 images!


Or make a timeless art-to-wear piece using The Paganoonoo Boro-Style Jacket tutorial.  Built on a waffle robe, this jacket has a myriad of design possibilities.  Artistic choices are explored in the tutorial. 
 Recommended for experienced sewists.

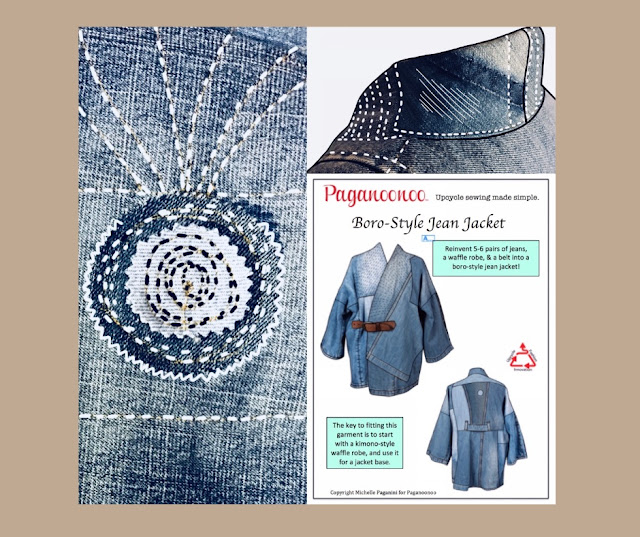
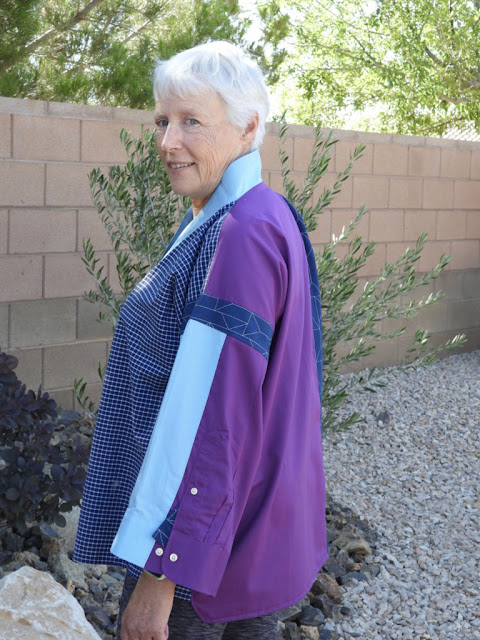
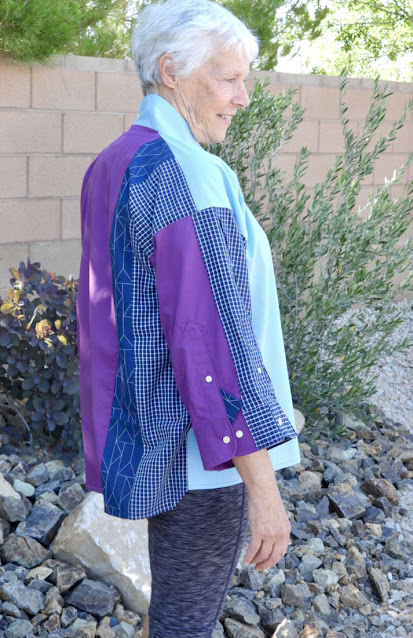
Alternatively, make the Paganoonoo Carol Jacket, the only Paganoonoo with actual pattern pieces (vs. step-by-step deconstruction and reconstruction illustrations and text), PDF version only.  
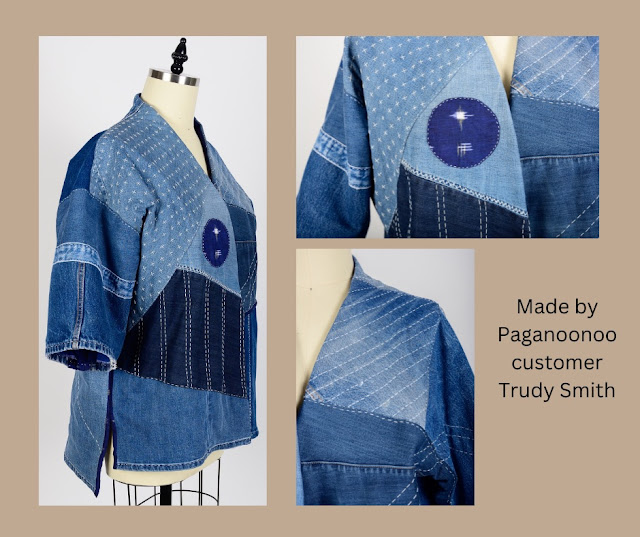
This unlined jacket with wide sleeves is perfect for layering.

Your entry can be any clothing item or accessory made of upcycled denim - it doesn't have to be a Paganoonoo design. The possibilities are endless, What will you upcycle from denim?


Sunday, May 28, 2023

Paganoonoo Contest - Magnolia Pearl (c) Style Inspired

Embellishment is great way to breathe new life into a garment, especially something a simple as denim.  Magnolia Pearl (c) brand garments have a boho, romantic, shabby chic, grandmacore kind of vibe and frequently feature embellishments.

To enter the contest:

Once your garment is complete and shared on the Paganoonoo Upcycle Sewing Group on Facebook then send a message to Michelle via Facebook.

Here are some progress photos on a pair of overalls I'm working on.
My initial pin up:
Some details as they are sewn on.  I moved things around as I went along.  It turned out that what looked good pinned flat was not necessarily flattering in 3D.  I started to try on at each step, sewing on some of the bigger pieces first.

I had this graphic from a children's book printed up at www.Spoonflower.com.
The dinosaur patch is from https://www.etsy.com/shop/JodiLovesVintage
The bee patch is from www.etsy.com/shop/opalannie71 
Then I pinned on a whole lot more!  Probably too much. 
 I am thinking about next steps.  More updates later.
Too see all the entries so far, go to the Facebook group.  Hope to see yours soon!

Happy Upcycling, Michelle Paganini

Monday, April 10, 2023

Paganoonoo Judy Flower - easy scrap buster, great for gifts

Fabric flowers are fun to make, a great way to use scraps, easily dress up an outfit, and are terrific gifts. How to get started?

Paganoonoo has a set of illustrated instructions that walk you through every step. You will learn about sizing, fabrics, construction techniques and more.

This example uses shirting fabric from a man's shirt (perfect way to use leftovers from making Paganoonoo garments) and cashmere salvaged from a moth eaten sweater:

The fabric is added on layer by layer:

One option for a flower center is a faux seed head. 
In this case cashmere was selected in a matching color. Other options include a carnation like center and one that looks more like stamens.

Once attached the flower is complete:

In this example quilting cotton was used and the seed head fabric is left over from a dress shirt:

Below: In the top example the center is carnation-like. 
The one on the bottom is more like a stamen type.The one on the left is a variation using pinked felted wool circles in the center.

What colors would you like to make?  
Turn your scraps into treasures today!
Digital copy 


Sunday, April 10, 2022

Upcycled Dress with Bias Tape Accents - Critique

I recently took a class hosted by my wearable art guild, www.penwag.org, on the use of bias and straight of grain tape for embellishment.  The teacher was www.LorraineTorrence.com who does beautiful work. The class was in 2 parts: 1) technique & then build a garment using the techniques, 2) project show & tell with feedback and Q&A.

I dived in enthusiastically with a garment in mind.  My intention was to make a baby doll/empire waist style upcycled shirt dress, in a modified version of the Paganoonoo Rebecca Dress.  The skirt section is made using upside down sleeves with the cuffs forming the waistband and the sleeve caps the scalloped hem.

The result was a bit of a mixed bag and perhaps a work in progress with quite a bit of learning!


What I think works about my dress/design:
  • It is super comfortable! It is loose enough that I can sit on the floor to play with my grandson. This was a key consideration from the beginning.  I was willing to sacrifice flattering for comfortable.

  • The bias tape makes an interesting accent, highlighting the various shapes.

  • The color palette - if the front top and bottom were better tied together.

  • I was able to continue the bias tape over the pocket for a seamless line.

  • The crow patch.

  • The button accents.
What I would change next time (or maybe attempt to modify on this one):
  • The bottom (skirt) section is too high in the front and/or too low in the back. Due to the construction techniques used it would be impossible to lower in the front and possible but time consuming to raise in the back (most troublesome).

  • The contrast between the top and bottom of the dress is too pronounced in the front, with not enough to tie it together (potentially fixable and second most troublesome).

  • In an attempt to make a more fitted bodice I crossed over the bottom front plackets to take up some of the extra volume.  This did not take up enough volume to really work, and makes the bodice look crooked.  I would consider on the next one potentially making it a wrap dress in the front with tie closures for a better fit. (not easily fixable)

  • I pinked the edges on the shoulder sleeve seams, leaving them raw at the hem, then decided to add bias tape to the hem.  The raw edges poke out under the bias tape and look odd. (not fixable)

  • The scallop at the hem center back is too long, and the color stands out too much. (fixable)
Bottom line: Don't be afraid to experiment with new techniques.  I made mistakes on this dress and learned some things along the way.  The best way to learn is to do.

Happy upcycling, Michelle


Monday, September 13, 2021

Raw Edge Mandarin Collar Transformation

I scored a plain denim collared shirt recently at the thrift store.  It will make a great fall top or dress. I haven't decided which.  In the meantime, while on a zoom meeting and a bit restless, I picked up the shirt and seam ripper and picked out the top part of the collar.  

I'd done this before and just stitched it back up into a polished looking mandarin collar (tip on how to do that here).  This time I noticed the inside seam was a darker color as it had not faded in the laundry.  I like a raw edged look and the idea of a darker band on the top of the collar.  

I pulled up the seams, trimmed off the excess threads, layered them and hand stitched them together.  This makes the collar a bit taller and softer looking.

Next up - it is just a tiny bit too tight across the bust.  I think I will unpick the underarm seams and add a godet. 

More as it progresses!

Happy upcycling, Michelle

Sunday, August 29, 2021

Ellie Dress Hack - Turn your Paganoonoo Ellie T-shirt into a Dress!

The Paganoonoo Ellie t-shirt is flattering and comfortable, solving the common problem of not enough room in the hips and belly.  

Once you've transformed your t-shirt, it can also be made into a very comfortable and flattering dress.  This post provides links to the methods for the dress hack.

Here is an example of an Ellie t-shirt that has been transformed into a dress.  The bottom tier of the dress was made with another t-shirt and part of a vintage linen tablecloth.
 
Watch this video to see three examples of Ellie t-shirts, including the one above, that have been transformed into dresses.


There is also a one page instruction sheet that is a companion to the video. 
 A PDF copy is available here.

We also did a live zoom session with additional information. 
You can view it here.

What other Paganoonoo garment hacks would you like to see?
Let me know in the comments section.

Happy upcycling!

Michelle   

Monday, July 26, 2021

New Paganoonoo Design - The Carol Jacket

 Paganoonoo has a brand new design - the Carol Jacket! 

Based on a classic Japanese field coat, or Hanten, this versatile unlined unisex jacket can be made in 2 formats:  1) upcycled from dress shirts or 2) from denim jeans.

What is different about this design vs. typical Paganoonoo designs?  It is an actual pattern - printed PDF - you print tiled on your home printer or send to the print shop vs. deconstruction and reconstruction instructions.
Why?
With the Carol jacket you are cutting apart the starting garments to make color-blocked "fabric" that is then used to cut out each pattern piece. 

You decide how to distribute the shades & colors: light/med/dark.

Here pattern tester Lucy Sisson chose dress shirts in a muted palette of lavender shades.  Note that the dress shirt sleeves are used to make the jacket sleeves and the sleeve cuffs make the jacket cuffs.


Pattern tester Laura Fairchild also made her jacket from dress shirts but chose a bold palette.  It reminds me of Amish quilts.


Pattern Tester Marcia Mitchell made a multicolored denim version with large appliques and decorative ribbon.


Pattern Tester Kathleen O'Brien chose to add her embellishment to the front band and carried the original leather label forward to adorn a pocket.


The sleeves on the denim version are wider than the dress shirt.  This is to comfortably accommodate a sweater underneath without feeling constricted. 


Here I am modeling my version of the jacket made in jeans:


For a more in-depth overview watch this
YouTube introduction.

Make your own version today!  Perfect for any season, suitable for advanced beginners.
Purchase in Paganoonoo's Etsy shop.